Key Takeaways:
| Point | Description |
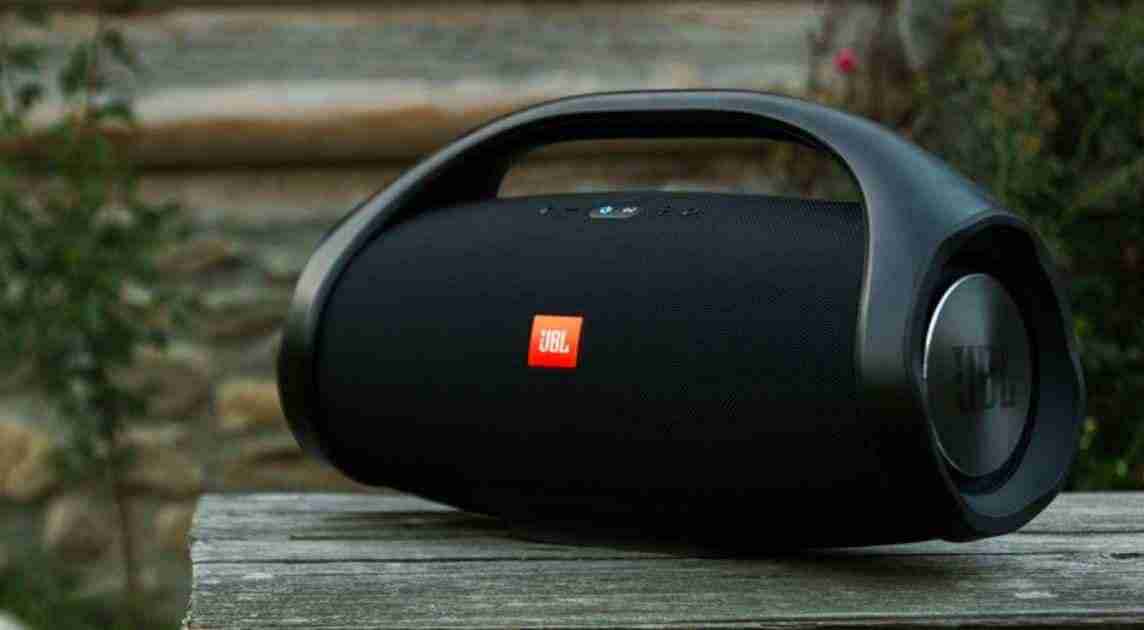
| JBL Charge 4 Button Functions Overview | The JBL Charge 4 portable speaker has a range of buttons that serve various functions including power volume control Bluetooth pairing and more. |
| Understanding the Buttons | Learn how to use the power button volume control buttons play/pause button and the JBL Connect+ button for syncing multiple JBL speakers. |
| Battery Status Indicator | Discover how the Charge 4’s battery status indicator button can help you monitor the speaker’s battery level and plan your usage accordingly. |
| Voice Assistant Integration | Explore how you can activate your smartphone’s voice assistant using the dedicated button on the Charge 4. |
| Troubleshooting Tips | Get solutions to common issues such as pairing problems and unresponsive buttons to ensure a smooth experience with your JBL Charge 4. |
JBL Charge 4 Button Functions: Mastering Your Portable Speaker
The JBL Charge 4 is a popular portable Bluetooth speaker known for its powerful sound and robust features. One essential aspect of using this speaker effectively is understanding its button functions. In this comprehensive guide we’ll delve into the various buttons on the JBL Charge 4 and how to make the most of them. From power management to volume control and even integrating voice assistants we’ve got you covered.
Button Functions Overview
| Button | Function |
| Power Button | Turn the speaker on or off. |
| Volume Control Buttons | Adjust the volume up or down. |
| Play/Pause Button | Control music playback skip tracks and go back to the previous track. |
| JBL Connect+ ButtonSync multiple JBL speakers for a synchronized audio experience. | |
| Battery Status Indicator | Check the battery level and receive low battery alerts. |
| Voice Assistant Button | Activate your smartphone’s voice assistant for hands-free commands. |
Understanding the Buttons
Let’s start by exploring the primary buttons on your JBL Charge 4 and what each of them does:
1. Power Button
The power button is located on the top of the speaker and is used to turn the device on or off. It’s essential to know how to use this button to conserve battery life when the speaker is not in use. Here’s how to operate it:
- To turn the Charge 4 on press and hold the power button until you see the LED lights illuminate. You’ll also hear an audible sound to indicate that the speaker is powering up.
- To turn the speaker off press and hold the power button again until the LED lights turn off.
2. Volume Control Buttons
The JBL Charge 4 features volume control buttons on the top of the device just below the power button. These buttons allow you to adjust the speaker’s volume levels to your liking:
- Volume Up (+): Press this button to increase the volume.
- Volume Down (-): Press this button to decrease the volume.
These buttons are handy when you want to fine-tune the audio output for your listening environment. Whether you’re cranking up the tunes at a party or enjoying some quiet background music the volume control buttons are your go-to tools.
3. Play/Pause Button
Located between the volume control buttons the play/pause button is a multifunctional key that allows you to control your music playback:
- Play: Press this button once to start playing music from your connected device.
- Pause: Press it again to pause the playback.
- Skip Tracks: You can skip to the next track by double-pressing the play/pause button.
- Go Back: To return to the previous track triple-press the button.
This versatile button lets you manage your playlist without reaching for your smartphone or tablet.
4. JBL Connect+ Button
If you own multiple JBL speakers that support JBL Connect+ the Charge 4 can serve as the hub for syncing them together. The JBL Connect+ button located near the play/pause button allows you to connect multiple JBL speakers for a synchronized audio experience. Here’s how to use it:
- Ensure that all the compatible JBL speakers are turned on and within Bluetooth range.
- Press and hold the JBL Connect+ button on your Charge 4 until you see the LED lights blink rapidly. This indicates that the speaker is in pairing mode.
- The other JBL speakers should also enter pairing mode automatically and connect to your Charge 4.
- Once connected you can enjoy music playback on all synchronized speakers simultaneously.
This feature is perfect for amplifying your audio experience at parties or events.
Battery Status Indicator
The JBL Charge 4 is known for its long-lasting battery life but it’s still essential to keep an eye on the battery level to avoid unexpected interruptions. The Charge 4 has a dedicated battery status indicator button that helps you monitor the battery level. Here’s how to use it:
5. Battery Status Indicator Button
Located on the top of the speaker just below the JBL logo the battery status indicator button provides information about the current battery level:
- Press Once: Tap the button once and the LED lights near the button will illuminate to show the approximate battery level. Four lights indicate a full charge while one light means it’s time to recharge.
- Low Battery Alert: When the battery level is critically low the Charge 4 will alert you by flashing the LED lights and making a sound. It’s your cue to recharge the speaker.
Monitoring the battery status using this button is a convenient way to ensure that your JBL Charge 4 is ready for your next adventure.
Voice Assistant Integration
The JBL Charge 4 also offers voice assistant integration allowing you to access your smartphone’s voice assistant without picking up your phone. This feature can be incredibly handy when you need quick information or want to control your smart home devices. Here’s how to use it:
6. Voice Assistant Button
The voice assistant button is located on the top of the speaker near the power button. To activate your smartphone’s voice assistant follow these steps:
- Ensure that your smartphone is connected to the Charge 4 via Bluetooth.
- Press and hold the voice assistant button for a few seconds until you hear a beep. This indicates that the voice assistant is ready to take your commands.
- Speak your voice assistant’s wake word (e.g. “Hey Siri” for Apple devices “Hey Google” for Android) to start using voice commands.
- Ask questions set reminders control music playback or perform any other voice assistant tasks as needed.
The voice assistant integration enhances the functionality of your JBL Charge 4 making it a versatile companion for your daily activities.
Troubleshooting Tips
| Common Issue | Troubleshooting Steps |
| Pairing Problems | 1. Ensure Bluetooth is On. 2. Clear paired devices. 3. Update firmware if available. |
| Unresponsive Buttons | 1. Reboot the speaker. 2. Perform a factory reset (refer to user manual). |
Detailed Troubleshooting Steps:
7. Pairing Problems
If you’re having trouble connecting your device to the JBL Charge 4 via Bluetooth try the following solutions:
- Ensure Bluetooth is On: Make sure that Bluetooth is enabled on your smartphone or tablet.
- Clear Paired Devices: If you’ve previously connected multiple devices to the speaker clear the list of paired devices and try connecting again.
- Update Firmware: Check if there are any firmware updates available for your Charge 4 and install them as needed.
8. Unresponsive Buttons
If the buttons on your Charge 4 are unresponsive follow these steps:
- Reboot the Speaker: Turn off the speaker wait a few seconds and then turn it back on. This can sometimes resolve button responsiveness issues.
- Factory Reset: Perform a factory reset on the speaker to restore it to its default settings. Refer to the user manual for instructions on how to do this.
By following these troubleshooting tips you can overcome common issues and ensure a seamless experience with your JBL Charge 4.
- How do I turn on the JBL Charge 4?
To turn on the JBL Charge 4 follow these steps:
1. Locate the power button in the middle of the device.
2. Press and hold the power button until the back light behind the button turns on.
3. Release the button after a quarter second or so.
If the device does not turn on you can try a hard reset by pressing and holding the Play/Pause Volume Up and Volume Down buttons simultaneously. Alternatively you can try pressing and holding the Bluetooth and Volume Up buttons at the same time. If the device still does not turn on you may need to contact JBL customer support for further assistance.
- How do I connect my smartphone to the JBL Charge 4?
To connect your smartphone to the JBL Charge 4 you can follow these general steps:
1. Turn on the JBL Charge 4 by pressing and holding the power button until the back light behind the button turns on.
2. Press the Bluetooth button on the JBL Charge 4 to put it in pairing mode. The Bluetooth button is located on the top of the device next to the power button.
3. On your smartphone go to the Bluetooth settings and turn on Bluetooth.
4. Look for the JBL Charge 4 in the list of available devices and select it.
5. If prompted enter the pairing code “0000” or “1234” to complete the pairing process.
Note that the exact steps may vary slightly depending on your smartphone’s operating system and version. You can refer to the user manual for your specific smartphone and the JBL Charge 4 for more detailed instructions.
Additionally if you want to connect two phones to the JBL Charge 4 you can follow these steps[6]:
1. Turn on the JBL Charge 4.
2. Press the Bluetooth button on the JBL Charge 4 to put it in pairing mode.
3. Connect the first phone to the JBL Charge 4 by selecting it in the Bluetooth settings.
4. Press the Bluetooth button on the JBL Charge 4 again to put it back in pairing mode.
5. Connect the second phone to the JBL Charge 4 by selecting it in the Bluetooth settings.
Once your smartphone is connected to the JBL Charge 4 you can start playing music or other audio through the speaker.
- How do I use the power bank feature of the JBL Charge 4?
The JBL Charge 4 has a built-in power bank feature that allows you to charge your devices such as your smartphone on the go. Here’s how to use the power bank feature:
1. Turn on the JBL Charge 4 by pressing and holding the power button until the backlight behind the button turns on.
2. Connect your device to the USB-A output on the back of the JBL Charge 4 using a USB cable.
3. The JBL Charge 4 will automatically start charging your device.
Note that the JBL Charge 4 has a high-capacity 7500mAh rechargeable Li-ion battery that provides up to 20 hours of playtime. If you use the power bank feature to charge your devices it may reduce the amount of playtime you get from the speaker. Additionally the charging time for the JBL Charge 4 is approximately 4 hours.