Whenever you try to load files on your Acer laptop all you get in return is a buffering response. The only way to end this issue and keep the productivity high is by factory resetting the device. But how? You do not remember the last password you set. Let us find out how to reset Acer’s laptop to factory settings without a password?
We have highlighted five step-by-step methods to factory reset the Acer laptop without a password. Let us begin!
- How to reset the Acer laptop to factory settings without a password via Reboot Keys?
Whether you have Acer’s latest model or an old one- factory resetting the Acer laptop with reboot keys is the best way to do so. Before stepping into the process make sure your device is fully charged and not connected to any device.
- Turn off your laptop by pressing the Power key for 5 seconds.
- Now turn it on again by pressing the same key. Once the power light flashes press and hold the Alt + F10 keys simultaneously.
- From the popup menu click on Choose an Option. From there select Troubleshoot.
- Click on Reset this PC.
- Now you have two options. If you want to remove all of your data choose to Remove Everything. However if you forget to backup your data choose to Keep my files.
- Make sure your laptop is plugged in. Do not try to shut down the PC.
- Also read the instructions displayed on the screen. The process will take a few minutes have patience.
Note: This mentioned method is for Windows 10 operating system. Do not try to use it with Windows 8 or 7. If not you might lose your data.
- How to reset the Acer laptop to factory settings without a password via Repair disk?
Despite how simple the first method is the majority of the users find it confusing as they have to navigate through multiple steps.
You can have a repair disk and connect it with your laptop to factory reset it. If not download ISO files to create a repair disk using a CD or USB. Once done follow the steps below;
- Plugin your laptop and connect the repair disc.
- From the repair disk menu boot your Acer laptop.
- Confirm your language and input method.
- Now click on Next from the installation screen.
- Click on Repair your computer from the left bottom corner of the screen.
- Here you have three options. Click on Troubleshoot to reset your Acer laptop.
- From the next menu click on Reset this PC.
- Again choose between two options: Remove Everything or Keep my files.
- Confirm your operating system by clicking on Windows 10.
- Again choose between two options- clear All drivers or Only the drive where Windows is installed.
- Proceeding with that click on Just remove my files to keep your PC. Or Full clean the drive to recycle your PC.
- Lastly click on the Reset option to begin the factory reset process.
Note: The recommended process works only for Windows 10 operating system. The process will be different for Windows 8 and 7.
- How to reset the Acer laptop to factory settings without a password via Recovery Partition?
One thing we loved the most about the Acer Windows 7 operating laptops is the eResource Management feature. Without the need to go through settings and connect recovery devices this feature lets you factory reset the laptop per desired settings. To do so;
- Enter the eResource Management and navigate to the initial menu to enter the BIOS.
- Restart the PC and press and hold the F2 key.
- Now press the following keys in an algorithm. Press Up + Down + Left + Right keys.
- It navigates you to the primary tab to allow the D2D restoration.
- To avoid wasting adjustment press the F10 key.
- After exiting the BIOS keep pressing the Alt + F10 keys. By doing so the Windows will reload your recovery files.
- Lastly for factory default select the Full recovery option and follow the instructions on the screen.
Note: Do not try to follow this method on Windows 10 operating system as it is only for Windows 7.
- How to reset the Acer laptop to factory settings without a password via Air Recovery Management?
Like the earlier mentioned process this also works only for Windows 7 operating system. You can directly navigate to the recovery management menu. Nevertheless if you are unable to get there follow the steps below;
- Press and hold the Alt + F10 keys multiple times.
- Now restart your PC and again press the Alt + F10 keys.
- Now click on the Restore option.
- Here you got three options to choose from;
- Install drivers
- Reset the system to factory defaults entirely
- Reset the system and retain your data
- Make sure to choose wisely among the options.
- Now follow the on-screen direction to begin the factory reset settings.
- How to reset the Acer laptop to factory settings without a password via Password Recovery Tool?
Resetting the Acer laptop to factory settings without a password is not the ultimate solution. At some points you need a password to navigate to the settings to alter your privacy protection. Download the password recovery tool.
The tool will let you recover your password without losing your data. The best part about the password recovery tool is it works with every operating system.
About which tool to use you will get a dozen of options. Ensure to have the one that is compatible with your Acer laptop.
How to Reset Acer Laptop to Factory Settings in 8 Easy Steps
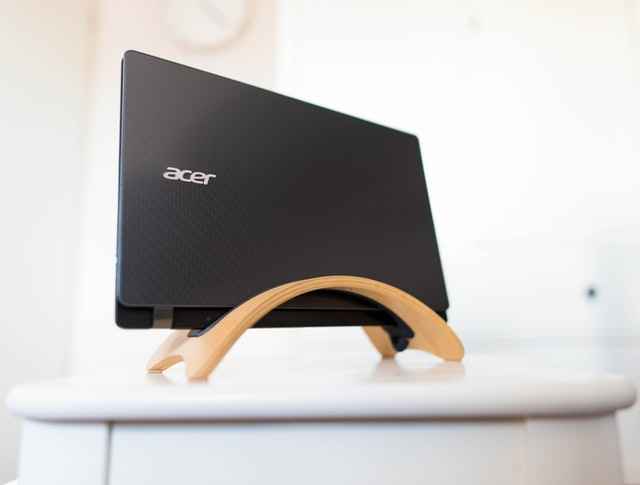
How to Reset Acer Laptop to Factory Settings in 8 Easy Steps? Acer (stylized as Λcer) is a Taiwanese multinational hardware and electronics corporation specializing in IT products particularly computer hardware like laptops tablet computers servers storage devices and peripherals. When the laptop is no longer working correctly and you have already tried all troubleshooting steps on the device then you can reset the laptop to factory settings which will return the laptop to the original state when it was first purchased.
Why do I need this?
Most of us have several different ways of using our laptops—from personal use to work and back again. This means that your computer can become contaminated with a variety of malware and viruses. The last thing you want is for your laptop and all of its information (emails contacts documents photos) to fall into unauthorized hands.
That’s why you need a method for resetting your laptop back to factory settings. Here are eight easy steps on how to do just that 1. Go to Start -> Control Panel -> System and Security -> Backup and Restore Center -> Create a system image (Windows 7 or Vista) or Restore your computer using a system image (Windows XP). You can also find these options by right-clicking Computer from Windows Explorer then clicking Properties > System Protection > Create or Restore Snapshot. If you don’t see these options go ahead and click Create.
A wizard will walk you through creating an image backup of your entire hard drive. This process can take anywhere from 20 minutes to 2 hours depending on how much data needs backing up.
2 Methods To Reset Acer Laptop To Factory Settings
There are 2 ways you can use to reset your laptop. The first is by following some of these simple steps: Press the Windows + R buttons on your keyboard at once. This will open a ‘Run’ window on your screen. Now type ‘MSConfig’ in the search box and press Enter. A program named System Configuration Utility will now open up. Click on the Startup tab from the left side and uncheck all options that have Load startup items written under them.
Click on Apply button followed by the OK button to save changes made. Restart your computer for changes to take effect. To reset the Acer laptop using Windows 7/8/10 method please follow these steps: Open the Start menu from the bottom left corner of your screen or click on the Windows icon present in the taskbar (located at the bottom).
Click All apps located below the start menu or the Windows icon present in the taskbar (located at the bottom). Scroll down till you find the Windows PowerShell option right-click it and select the Run as administrator option from the drop-down list.
Step 1: Power On the Computer
You can’t reset your laptop if it’s off so first you have to turn it on. If your computer is running Windows XP or Vista press and hold F8 while it boots up; if you’re using Windows 7 press Shift+F8 after you hear a beep that sounds like a chime. This will bring up Advanced Boot Options; select Repair Your Computer. If all goes well you’ll see a Command Prompt window.
If not try rebooting again and repeat Step 1. If it still doesn’t work check out Acer’s website for troubleshooting advice. In any case at some point you should end up with a C:\> prompt (with C being whatever drive letter Windows is installed on). Type cd.. and press Enter to move one directory back (to get into Program Files). Now type cd recovery manager and press Enter. You should now be at C:\Program Files\eRecoveryManager>. Type xecfg rsm –reset=all –action=reboot –factory-defaults-off and press Enter; when prompted for confirmation hit Y for yes.
Step 2: Press F2 Key to Enter BIOS Setup Utility
Step 2 of How to Reset Acer Laptop to Factory Settings is entering the BIOS setup utility. You can enter the BIOS setup utility by pressing the F2 key right after powering on your computer as long as your computer supports function keys.
Otherwise you can navigate the Windows system and enter BIOS setup utility via the utility menu under Control Panel: Start > type BIOS or setup (if there is no category named BIOS or setup then refer to steps below). If you are using a desktop computer please press the Esc key before clicking Enter Setup to enter the BIOS setup utility. If you are using a laptop please shut down your laptop first before following steps 3-8 of How to Reset Acer Laptop to Factory Settings.
The default password for most computers is empty. If it has been changed from its default value please use admin instead of the user when setting up a new password for the BIOS setup utility (the user name and password are case sensitive)
Step 3: Navigate To Power Management Tab
Press Control Panel -> Hardware and Sound -> Power Options -> Change Plan Settings -> Change Advanced Power Settings. Navigate to Reset under the Sleep option and then click on it. Select Reset after the dialog box appears on your screen. And then choose OK from the dialog box that appears next as shown in a given image. So all changes take effect immediately.
You can see some of them like a desktop background or other programs start position on your computer’s desktop will be changed back to default settings. After resetting restart your computer once again for new settings to take effect. You can use these methods anytime you want if you are not satisfied with the current settings of your laptop or desktop PC. So make sure you must try out at least one time these tips which I have shared above with you all and enjoy your new experience while using a laptop or PC which is set to factory settings now. It’s very easy to do so so don’t waste any more time guys!
Step 4: Set USB Wakeup from S3 Option Enable
To configure USB wakeup from the S3 option you need to set a Wake on PS/2 device and a Wake on USB option for your laptop. Click the OK button after making changes to your configuration. Save changes and exit BIOS setup.
Restart your computer and check if it works properly or not. If it doesn’t work then go back to BIOS setup again and change the settings of USB wakeup from the S3 option enable or disable as per your requirement.
If you have been searching for a solution on the internet then here is your solution. Following are a few steps that can help you out easily to set USB wakeup from the S3 option enable or disable. First of all turn off your laptop and then connect it with a power adapter. Now boot your laptop and enter BIOS setup after 30 seconds of pressing the F2 button as soon as the laptop boots up. Now locate the Advanced menu on the left side and select USB Wakeup from the S3 option Enable or Disable based on your requirement. Make sure that Exit & Save Changes is selected and press Enter button. After making changes successfully check if the USB wakeup from the S3 option works properly or not.
Step 5: Select Save Changes & Exit BIOS Setup
Once you’ve confirmed that your settings have been applied select Save Changes & Exit BIOS Setup to save changes and restart the computer. If it asks you whether you want to reboot now or later select Reboot Later. Otherwise just select Yes and the computer will restart automatically.
You can follow steps 1-4 again if you need to make further changes. After rebooting go through step 5 again if necessary. You can also use a USB flash drive with Windows preinstalled on it instead of CD/DVD drive. This is especially useful when you are setting up a new laptop or reinstalling Windows on an existing one.
Step 6: Disconnect Any External Devices Connected To The Computer
Now if your laptop is connected with any other devices such as printers scanners and so on disconnect it from them. Disconnecting these devices will help you reset your laptop’s factory settings without creating any problems. You can also restart your computer to complete step 5.
If you don’t want to restart your computer then unplug all external devices except the keyboard mouse and monitor. This step is necessary because when a device is connected to a system then even after resetting or formatting its OS will not change. It means that data present in those devices may still be accessible after the restarts of the system. Therefore unplugging all external devices (except keyboard mouse and monitor) will delete all stored data completely.
Conclusion
So are you done with factory resetting your Acer laptop? All mentioned methods have some advantages with few drawbacks. Nevertheless the guarantee of a successful factory reset depends on how proficiently you follow the process. Ensure to comment below on which method works the best for you to factory reset your Acer laptop.